Get your weekend off to a bang with our fun bonfire night themed activities that will spark the creative side in your little one.
Our craft activities are the perfect alternative if your little one finds the sound of fireworks scary. They will also create loads of new opportunities for you both to chat and learn new words!
Simple to follow and easily enjoyed from the comfort of your own home, our step-by-step instructions include advice from Speech and Language Therapist, Janet Cooper, on how you can use these activities to help boost your little one’s language skills.
Well, what are we waiting for? 3… 2… 1…
BLAST OFF!
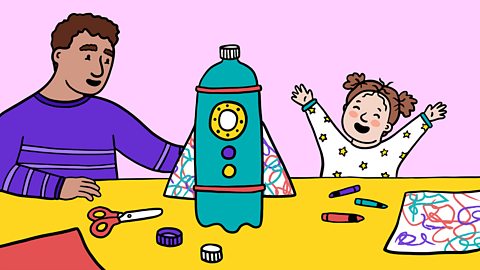
1. How to make a recycled rocket
What you need:
- Plastic bottle
- 4-5 bottle lids (mixture of sizes)
- 1 piece of card (or you could use an old cardboard box)
- Colouring pens or pencils
- Liquid glue
- Safety scissors
- Rice (optional)
Use the preparation time as a chance to talk about the objects. Can your little one find the item you name? Can they name the items by themselves? Can they count how many lids there are?
As you talk through the items together, mention the shapes and textures and use describing words like squashy, hard, bendy, sticky, and sharp.
How to make it:
Step 1: Cut out two “wings” in a triangle shape, similar to the image above.
While chatting to them about what you are making, why not try emphasising key words? “We’re making a rocket. Here are the wings. The wings help the rocket to fly. The rocket is going to go up in the sky.”
Step 2: Draw a design on the wings using coloured pens or pencils.
As they are drawing their masterpiece, you can ask them to find you a certain colour. If they are struggling, try giving them a choice between two.
As you colour in together, you can use words and phrases like “wriggle”, “line” and “round and round” to describe the shapes they are making.
Step 3: Glue them to your plastic bottle from the back.
Step 4: Next, glue your largest lid to the bottom as a stand.
Step 5: Finally, glue the other three lids to the front and get ready for take off!
When the rocket is ready, see if they can follow different directions. You can ask them to make their rocket fly up, fly down, zoom around, jump, go fast, or go slow. Switch it up and keep things fun!
These types of action words are great for developing an early language foundation, as well as introducing your little one to building sentences. Why not try adding in actions along with the words to help them link the action with the meaning?
The fun doesn't stop have to stop there. You could fill the bottle up with rice and use the rocket in a sound effect story at bedtime!

2. Sparkler Sticks
What you need:
- Tissue paper (yellow and red if possible but you can use any)
- Tin foil
- Thick straw
- Sellotape
- Safety scissors
How to make it:
Step 1: Cut the tinfoil to the same size as the tissue paper. Aim for A4 size.
Talk about what you are doing as you are making the sparkler. Use action words like “roll”, “cut” and “round and round” to help your little one link what you are doing with the words to describe it.
Step 2: Put the tinfoil in between two sheets of tissue paper like it’s a sandwich filling.
Step 3: Lengthways, fold the three layers in half.
Step 4: From the open end, cut strips towards the fold but don’t cut the fold itself.
Step 5: Wrap the cut tissue paper and foil around the end of the straw, using sticky tape as you go to secure it in place.
Step 6: Continue rolling until all the tissue paper and foil is tightly wrapped around the end of the straw.
When you have finished making your sparkler, try encouraging them to draw shapes in the air. Try saying, “Can you draw a ball? What about a dog?”
If they already know words like this, then it is a great chance to build on them. However, if they aren’t aware of these words yet you can start by using simple single words like “up”, “down”, “shake” and “wiggle.”
You can also point to relevant parts of the sparkler and use describing words like “shiny”, “soft” and “slippery.” If you talk about things as your child is looking and showing an interest, they will start to make a connection between the two.

3. Bonfire Collage
What you need:
- A4 card
- Mixture of coloured leaves (ideally yellow, orange and red)
- Twigs
- Empty cereal box
- Safety scissors
- Liquid glue
Why not go on an Autumn walk with your little one to hunt for a mixture of leaves and twigs? You can collect the leaves together and compare sizes and colours, masking language learning with a fun family walk.
You can ask them to choose which one is their favourite and encourage them to feel the texture of the leaves, chatting through the different shapes and edges as they do.
You can also point to the trees and show them how some leaves are “on”, and some are “off.” You can kick them and scrunch them, gather them, and throw them, mentioning the different sounds you can both hear.
What child doesn’t like to play an action game? Try calling out different instructions like “kick”, “throw”, “scrunch”, “catch” and “blow” and see if they can understand what you are asking them to do. Can they tell you what to do?
How to make it:
Step 1: Cut out one side of the cereal box and glue your A4 card to it.
Step 2: Once dry, arrange two sticks in the shape of a cross at the bottom and glue them down.
Step 3: Repeat this process several times until you have a small pile of twigs.
Step 4: Place your yellow leaves on the piece of card just above the twigs - to form the bottom section of the fire. When you are happy with the shape, glue them down.
Step 5: Now do the same process for the next two sections of the fire, using orange for the middle and red for the top.
Step 6: Leave it to dry before sending us a picture of your finished masterpiece via our Instagram page!
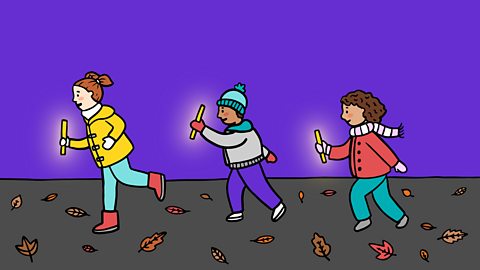
4. Glow stick tag
What you need:
- An open space
- 1 glow stick
How to play:
A simple game of tig with a twist! One person is “it” and uses the glow stick to tag the other players. Once they tag them, they hand the glow stick over to the next person who is “it”. Turn the light off to make it even more fun!
Or to turn things up a notch for older children, why not make a rule where, when you are tagged, you must do star jumps until another player (not the one who is it) taps you on the shoulder. If all players end up doing star jumps at the same time, the person who is “it” has won!
This game is another great opportunity for language learning. You can do this by switching up the star jumps for a different action like clapping or touching your head. Doing this will help your children pay attention and understand language, as well as learning about cooperative play.
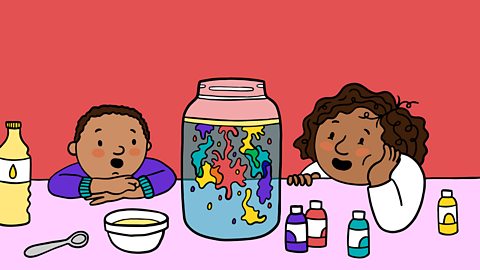
5. Fireworks in a jar experiment
This visual activity is great for encouraging your little one to pay attention, especially if they have a short attention span.
Younger children in particular will find it very exciting watching all of the different colours move around. If your child speech delay, this is a great sensory activity for them to get involved in.
What you need:
- 1 jar
- 1 bowl
- Warm water from the tap
- Food colouring
- 3 tbsp of vegetable oil
How to make it:
Step 1: Fill the jar ¾ of the way up using warm water from the tap.
Step 2: In the bowl, place three tbsp (approx) of vegetable oil.
Step 3: Carefully put drops of food colouring into the oil.
Step 4: Mix it all gently with a fork, just enough to disperse the food colouring a little bit. You will notice it doesn’t mix with the oil, it just breaks up into smaller dots.
Step 5: Now pour the contents of the bowl into the jar filled with warm water.
Step 6: Watch as the coloured drops sink down into the water and mix together creating a firework effect!
As the colour travels through the jar, use simple words like “up” and “down.” Before turning the jar over, build tension by saying “ready… steady… go!”
We hope you and your little one get the chance to enjoy some of these sparkling activities! If you give them a go, feel free to send us a picture via our or .
If your little one is scared of fireworks, we’ve put together some helpful advice that you can read here.